Have you thought about creating TikTok videos? I’ve had a lot of conversations this spring about TikTok. It’s a platform full of short videos and the past few months I’ve posted EdTech tips on TikTok. So today I wanted to share a strategy with you to make TikTok videos… one that doesn’t include your killer dance moves.
Now you might be thinking, Monica, there is no way I’m going to create short videos and post them on TikTok. And that is totally fine. This blog post is still for you. Why? I’m going to take you through a video creation strategy that you might want to tailor to student creations for their own TikTok-inspired projects.
Creating Slideshow Videos
Regular readers of the blog (sign up here for my free newsletter) know how much I love the Adobe Spark tools. Ben Forta and I wrote a book titled, 40 Ways to Inject Creativity into Your Classroom with Adobe Spark, all about classroom creation activities. In this blog post, I’m going to share a strategy for using Adobe Spark to make TikTok videos. This video creation strategy is customizable so that you might tailor this activity for your group of students — or your TikTok video creations.
Let’s dive into how you can use Adobe Spark to make TikTok videos!
@classtechtips Three of my favorite self-care apps for teachers ##learnontiktok ##tiktokpartner ##selfcare ##selfcareisforeveryone ##selfcareroutine
♬ Electro-Indie – Lynn Standafer
Use Adobe Spark to Make TikTok Videos
The steps I’m going to take you through can be used in the Adobe Spark Post app. Of course, you could do this with Spark Post on the web, but because TikTok is a mobile app, I find my workflow simpler by starting on my phone and using the mobile app to create. If you haven’t downloaded Spark Post on your device, the mobile app is available on iOS for Apple devices like an iPhone or iPad. It is also available on the Google Play app store for Android devices.
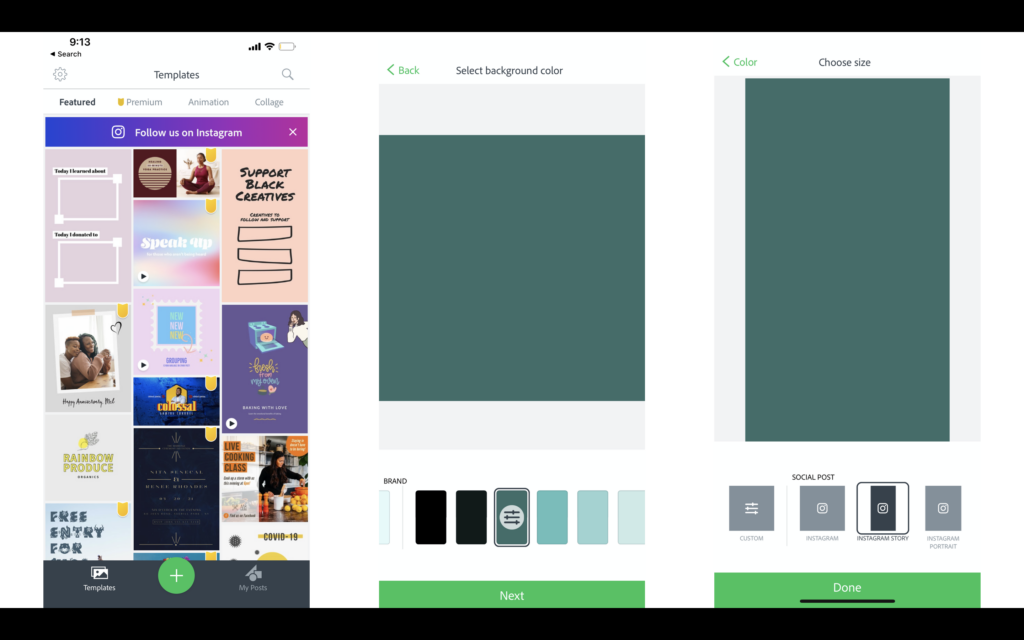
First up, open the Spark Post app and decide if you want to use a template or start from scratch. For the example I’m sharing today, I’m going to start from scratch and tap on the plus sign at the bottom of the screen. This allows me to choose what I want to put in the background of my image. I will select a solid color for today, but you could choose a photo for the background if you wanted to.
Setting Up Your Slides
Next, I chose a background color. If you have the branding set up in Adobe Spark (learn more here), then you’ll see those colors pop up first as your suggested colors. Then, you’ll choose your size. I chose the Instagram story size because it’s the same size as my phone. This sizing means it will look great on TikTok.
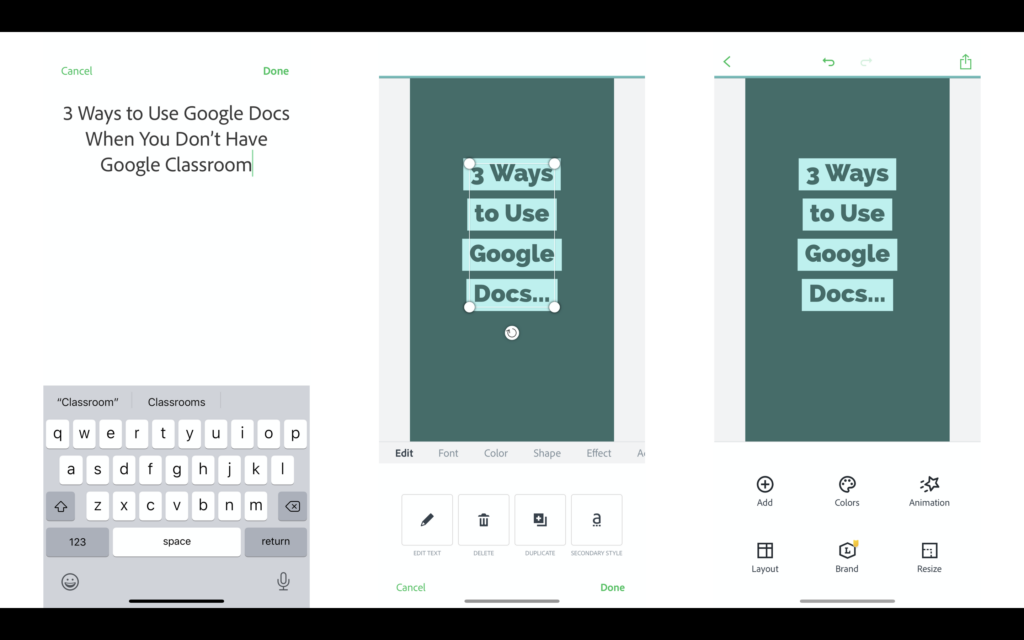
When creating a video for TikTok, I want to make sure I’m sharing information in sequence so a viewer can follow steps or get a few different tips. So I will essentially make one graphic for each step that I want to include in my video. I’ll start with a title slide, and then I’ll begin adding each individual image to show off each step. For this example, I’m going to turn the tips from this podcast episode into a TikTok video.
Adding Icons to Your Slides
I’m going to follow the same steps and repeat them a few times so that I can download a series of images I’ve created with Spark Post and then add them to TikTok to make a slideshow. After adding my text, I can decide if I want to add an image or icon or both to my graphic. I decided to add an icon to my graphic, and I can search through The Noun Project‘s library, which is built right into the Spark Post app.
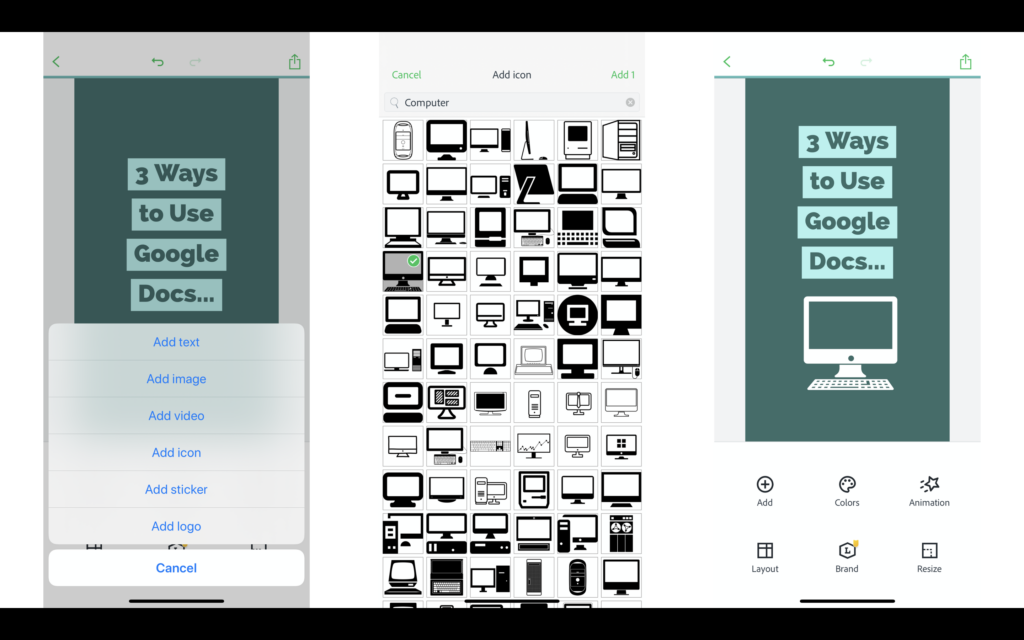
After I’ve made my first slide, I can download it to my phone by choosing the save image option that will save the graphic to camera roll, and I can keep going with each graphic that I want to appear in my slideshow. So essentially, I’m repeating this step multiple times until I have the desired number of slides that I want to go into my TikTok video. I would suggest choosing between seven to ten of these slides to create a TikTok video that shares information but also isn’t too long.
Publishing Your Slideshow on TikTok
After you’ve created and saved all of your graphics, you should see them in your camera roll or photo library on your device. All nine of mine are waiting for me in my camera roll. Next, I can open up my TikTok app and press the plus button to create something new. This article gives you information on how to set up a TikTok account.
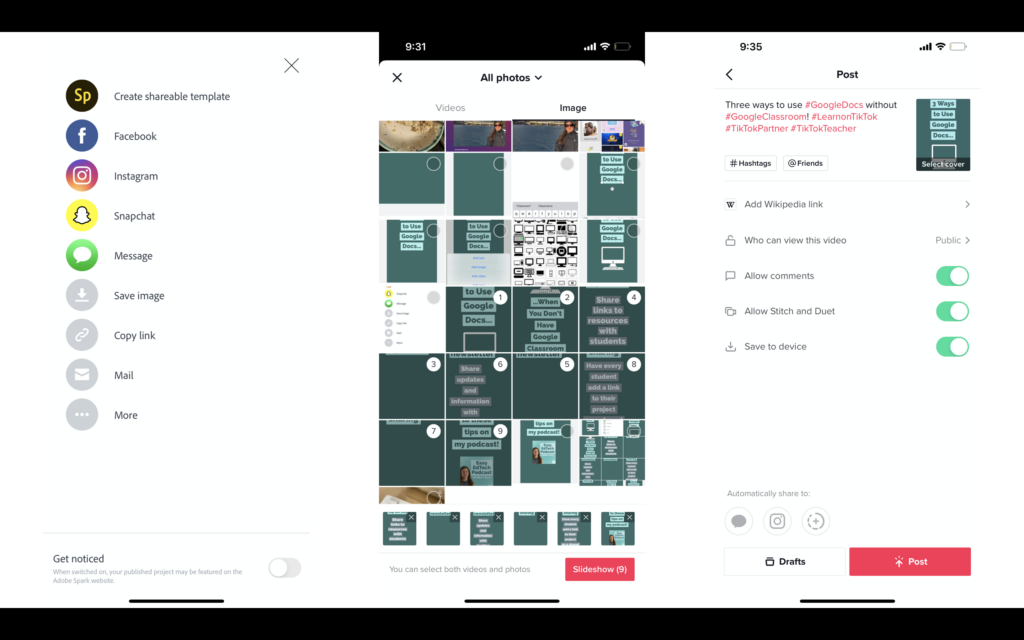
Then, choose the upload button on the bottom of the screen. This will take you to all of your recent photos, including all of the graphics you created with Spark Post. Starting with your first image, click on all of the ones you want to use to build your slideshow. You can rearrange or reorder them, and you will see them all down at the bottom of the screen. Then tap the slideshow button, and it will automatically create a video for you with your slides.
@classtechtips Three ways to use ##GoogleDocs without ##GoogleClassroom! ##LearnonTikTok ##TikTokPartner ##TikTokTeacher
♬ Electro-Indie – Lynn Standafer
Then you can decide if you want to add music by choosing a sound button at the bottom of the screen. Before you post, you can add a description, hashtags and choose a cover. Once it’s live, you can share it with the world! Just grab the link and let other people know that you posted a video.
I can’t wait to see what you create! If you make slideshow videos with Spark to share on TikTok, make sure to let me know. You can tag my TikTok username in your caption. Head over Adobe Spark’s website to get started, or download the Spark Post app!
