This week I’m excited to share lots of favorites at ISTE’s annual conference. From favorite open-ended creation tools to formative assessment tips, it will be an action-packed week! It seemed like the perfect time to share a must-try combo for educators. So I’ve put together a list of ways Adobe Spark and Nearpod are a fantastic pair of EdTech tools!
Adobe Spark in the Classroom
If you haven’t used the Spark tools before they are totally free, intuitive creation tools for students, professionals, and creatives in any industry. I’ve shared Adobe Spark a handful of times on my website because it is so student friendly. This year, the team at Adobe announced that K-12 schools could access all premium Spark features for free. You can learn more about the announcement in this blog post.
Spark Video is a moviemaking tool students can use to combine voice, text and more. Students can create All About Me videos, or capture stories from their day. Spark Page lets users design and publish a website. Your students might show off highlights from the school year, or you might show off student work. Spark Post is a graphic design tool perfect for quick creation opportunities. You can use it for virtual exit slips or to capture book quotes.
All of the Spark tools are accessible on a web browser, so they are Chromebook-friendly. Additionally, you can find all three as individual apps for iOS devices. No matter how you decide to use them, these tools offer endless possibilities for student creators!
Nearpod Presentation Tool
Nearpod is a favorite interactive presentation tool that I share with educators and students across the country. In addition to sharing a slide deck with a student audience, Nearpod lets users embed questions to check for understanding. This feature lets you push out a few quiz questions, a poll, an open-ended response, or even an opportunity for students to respond with a drawing.
I became a fan of this tool as a one-to-one classroom teacher, and just like the Spark tools, I share Nearpod in K-12 settings. If you’re entirely new to this tool, take a look at my post with an overview of Nearpod. You might also want to learn more about the virtual reality features or how Nearpod fits into Pre-K classrooms.
Adobe Spark and Nearpod App Smash
I love combining favorite tools, and Adobe Spark and Nearpod are a must-try combo. On this list, I provide an overview of tips for making the most of these two powerful EdTech tools. Whether you’re totally new to Adobe Spark and Nearpod, or ready to energize your practice, this combo is definitely work exploring!
Spark Post and Nearpod
Spark Post is a graphic design tool you can use for a variety of purposes. As student creators, students can capture special moments for their school and share their learning with the world. As an educator, one way I use Spark Post is to create slides for presentations.
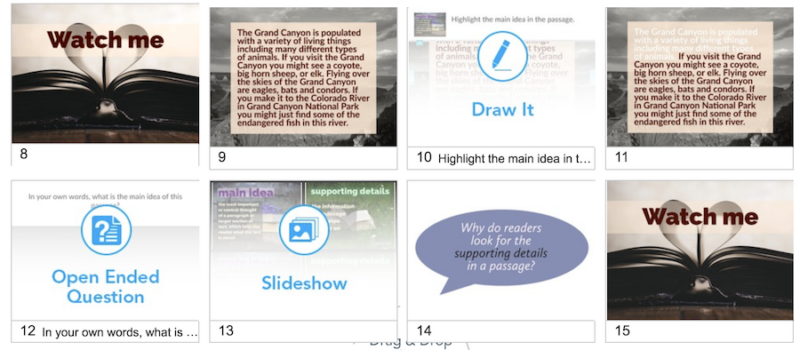
Last year I shared this tip for using Spark Post to create slides for Google Slides. By choosing the shape with the dimensions of a slide, you can create beautiful slides to add to a Nearpod presentation. In the image above, you can see how I used Spark Post to create images I used in a Nearpod presentation with a group of fourth-grade students. You can read about that lesson in this blog post. In addition to creating slides, I used Spark Post to create images for (1) students to annotate text and (2) a slideshow.
Nearpod does allow users to create slides right from within their creation dashboard. I prefer to make my slides outside of Nearpod, so I can have a bit more control of the position of text and images. Since Spark Post lets users search for high-quality photos and add icons to their slide, it is an excellent option for slide creation. Once you download your Spark Post design, you can add it to Nearpod with a drag and drop, or simply import the JPG file.
Spark Video and Nearpod
Nearpod lets users connect to a YouTube video or share a link to content hosted online. In the middle of an interactive Nearpod presentation, you might want to pause and show a quick video. If you or your students have created a Spark Video to share, you can add the link to the video to your Nearpod presentation.
After students watch a Spark Video you have chosen for them, they can respond to what they have seen. This response to the video can take many forms. You might decide to have students complete an open-ended response or use the Draw it feature in Nearpod to sketch a response.
Introducing a Spark Video project to students? You can use Nearpod to share a handful of examples you’d like the class to watch. Instead of launching a live Nearpod presentation, create a self-paced presentation code to share with students. Then they can take their time reviewing the Spark Video examples before jumping into their own video creation.
Spark Page and Nearpod
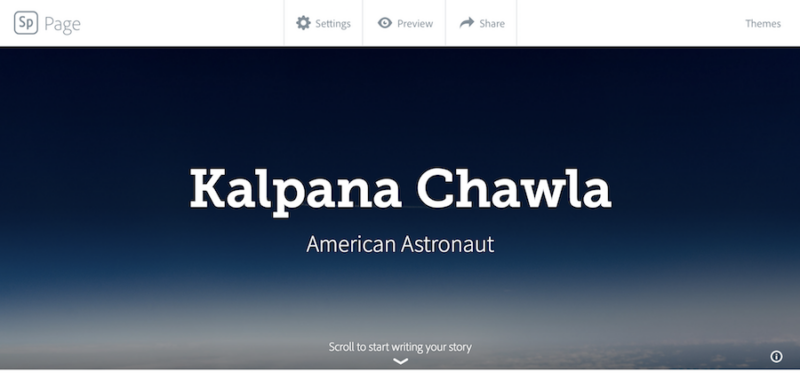
Spark Page is a powerful website creation tool. Users of all ages can create and publish a website that features images, video, links, and text. Similar to the strategy introduced above, you can use Nearpod to push links to different content out to students. If you’ve found a Spark Page on a topic you want students to explore, or you have created your own, you can share the link in Nearpod for all students to view. For example, if you have found or have created a page to profile an astronaut, you can share the Spark Page within a Nearpod presentation.
When leading a Nearpod lesson, students can talk with their classmates about a new topic, idea, or concept. Connecting a Spark Page to a Nearpod presentation gives students the chance to scroll through a website which contains both written and visual information on a topic. By incorporating a Spark Page into the flow of your lesson, you’re providing a moment for students to take more agency of their exploration of course material.
Are you using Adobe Spark and Nearpod in the classroom? Share your tips, strategies, or favorite activities in the comments below!
